Pedalboard Power Fallacies: What actually Matters?
Guitar gear culture is loaded with polarising topics. A close runner-up to the never ending debate on ‘soldered vs solderless cables’ is pedal power, specifically pedalboard power.
There are oodles of articles and videos suggesting all sorts of problems and remedies, but unfortunately, a lot of the time, the opinions are either ill informed or half-truths. Even the knowledge from qualified electricians, that deal with much higher (and dangerous!) voltages, isn’t directly applicable to 9-24v circuits. The typical power needed to operate our favourite little coloured boxes is way less problematic and less susceptible to the same issues that mains or high voltage power is.
In this blog we’ll cover a quick overview of pedal power, cover some simple rules to follow, and dispel a few misleading but popular opinions along the way.

UNDERSTANDING A PEDALS REQUIREMENTS
There are three main elements of power that are helpful for any guitarist to understand. Unless you’re a blaring success, with an entourage of roadies and stage crew, it’s worth memorising what voltage (v), amperage or more accurately for pedals milliamperes (mA) and polarity (-+) refer to.
VOLTAGE (v)
Voltage is important to understand but is also the easiest to grasp.
DC voltage, the vastly more common to us is ‘direct current’ that flows one way and AC voltage, not completely unheard of in pedals but somewhat rare, is ‘alternating current’ that cycles it’s direction of flow.
In simple terms voltage is the ‘Push’ that moves an electrical current along a conductor or wire.
What happens if you push something to hard? You can damage it. If we think of a pedal that needs 9v of push and we shove it with 18v it’s very likely that you’ll cause some damage that will void a warranty and require a technician (along with a technician fee) to repair it.
Likewise a pedal that needs 24v that is only given 9v isn’t getting enough electrical current ‘pushed’ into the circuit, so it won’t operate but most likely won’t get damaged.
The one exception to this rule is in some overdrive and fuzz circuits that can operate between 5v and 9v.
Supplying a varied amount of ‘push’ to these circuits can yield desirable characteristics like gating and spongey attack. This technique is called ‘voltage sagging’ and is sometime a feature on certain power supply.
AMPERAGE/MILLIAMPERES (mA)
Milliampere is the common unit for measuring current in pedal power. Current is the rate at which electrons flow through a complete circuit. Unlike voltage milliamps can not be over supplied.
If you have a 9v power supply with a mA limit of 1500mA and your Fuzz Face only needs 15mA don’t fret. Your pedal will pull what it needs from the available supply and the excess will not cause any issues.
On a high voltage scale, say Australian mains power 240v, this may not be the case, but on our low voltage pedal circuits the trivial amounts of current are inconsequential in excess.
POLARITY (-+)
Polarity refers to the positive and negative conductors we all have seen on batteries. Simply put, polarity is the direction of current flow, either through the tip of a power cable or the sleeve.
Polarity can be damaging to a circuit if it is the opposite of what a circuit is designed for.

This small image that you’ll see on just about every pedal or wallwart power supply is displaying if the centre, or tip, is positive or negative. Match this symbol on a pedal with the same symbol on a power supply and all is well.
POWER TIPS FOR PEDALBOARD BUILDING
Rewind a few years from now and there was a small amount of truly reliable power supplies available on the market, but things have changed somewhat.
A few brands pushed to the front of the pack in the mid to late 2010s, but the last 12 months in particular, have seen most brands in this category catch up or exceed the reigning benchmark.
So rather than bore you with comparison we’ll let you choose from our great selection. Don’t hesitate to ask us any questions!
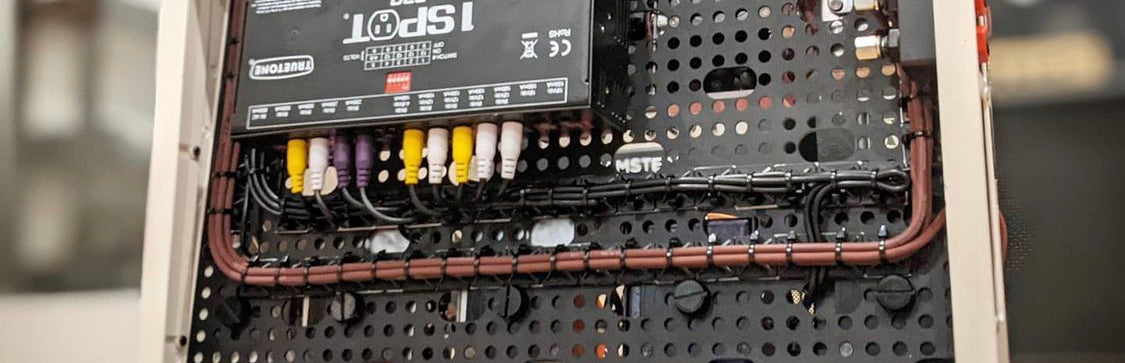
WHAT GOES WHERE?
POWER & AUDIO
This is probably the most controversial part of the power debate. Many people, reputable and some not so, will tell you that audio and power should never run together in parallel lines, only crossing if absolutely necessary at 90 degrees. The reasoning behind this is that parallel audio and power creates unwanted noise.
Let’s pull apart this half truth. The phenomenon being referred to here is when the magnetic field produce by a current interferes with an audio signal. This is absolutely a real thing… but the low voltage DC power all over our pedalboards has such a weak magnetic field that it will not have any significant audible artefacts when placed directly by audio cables.
If you use a pedal that has a mains power cable attached to it, like some old EHX or Carl Martin kit, this is a different story. That cable will present a stronger magnetic field, and quite possibly cause you some hums and annoyance.
Disclaimer, when we build pedalboards we do seperate audio and power as much as possible, but this is purely from a maintenance and aesthetic perspective. After all we all want the underside of our board to be just as pretty as the top right?
WAHS AND POWER SUPPLIES
Wahs, if you like them and want one on your board, are sometimes temperamental creatures. At their heart is an inductor coil that will sometimes interact with analog power supply transformers by picking up the 60hz hum emitting from it.
A simple fix if you think your wah is causing noise is to firstly make sure it’s on an isolated output from your power supply with adequate mA. If this box is ticked then try to put as much physical distance between your wah and power unit to avoid that coil grabbing on to hertz.
DAISIES ARE FOR PICKING, NOT POWERING
If the amount of pedals on your board exceeds the amount of outputs on you power supply, please, PLEASE DO NOT, resort to using a daisy chain cable to power the extra pedals.
Perhaps you’re reading this and you’re running your whole pedalboard on daisy chains… you, my friend, need to pay attention to this part.
A daisy chain has one ground connection, that all the pedals attached to it share. When a few pedals are powered on a daisy chain and share an un-isolated ground there is a significant chance of unwanted noise. Especially if there’s a mix of high current digital pedals and low current analog circuits.
The ground ‘potential’ from each pedal can vary quite dramatically, meaning that the discrepancies will converted to hum and white noise. Please, for the love of all thing good and lovely, get a properly isolated power supply, and chuck that daisy in the bin.
It's worth noting that some power supplies that are on the much more affordable end of the spectrum that claim to be isolated really aren't ideal. A lot of these cheaper units are essentially a 'daisy chain in a box' and you will be taking a sideways step rather than a step forward by choosing one of these. The rule of thumb to follow - if it's cheap it's nasty. $100 power supplies won't stand up against a $200+ unit.
You’ll also find that properly isolated pedals sound better and perform as they were intended. I’ve lost count of the amount of customers that have transitioned from daisy chains to power supplies and noticed a marked performance increase in their gear.
One more note on high current digital pedals, if you have one and are experiencing a high pitch whistle sound coming from your rig, then it’s likely that the digital pedal is not receiving enough current. Check it’s requirements and see if you can swap things around to up its milliamperes supply.
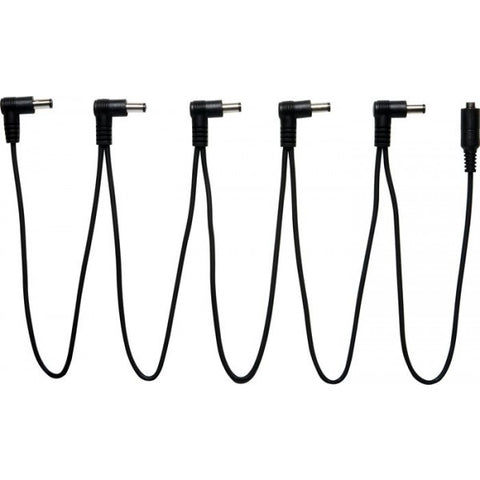
Right, back to the pedalboard with a few too many pedals for the power supply. The best approach to tackle this problem is not a daisy chain, it’s an output splitter cables.
These cables use one outlet on a power supply but split evenly to two plugs for powering two different pedals. The trick to making this work well is that one of the cables has the ground ’lifted’, essentially it’s not attached, meaning that is cannot interact with the other pedal sharing the output.
Experiment with which pedals work best to share an output. Usually low current devices are best to pair. If at first you get noise just try swapping them around so the opposite one is on the ‘lifted’ ground side. This usually works without a hitch.
WHAT TO DO WITH EXCESS POWER CABLE
So you’ve assembled your pedals on your board and you’ve plumbed in the power cables. You may find that you have a fair bit of excess length on some of those cables. What should you do with it?
There are four options… one is terrible, one is not great, one is good and acceptable, and one is next level awesome.
THE TERRIBLE
Let’s just leave all those cables flapping around under there with no tidying. No… please don’t. Not only does this look awful, it’s easy for one or more of those cable to get snagged on something or get tangled to the point of causing damage that will result in intermittence. Not what you want mid gig.

THE NOT GREAT
I’ve seen an alarming amount of boards where the excess power cable is coiled up into little ‘piggy tails’ and then fastened in place. At first this seems like an alright approach but in truth coiled cables like this will accumulate more heat, and heat is not something you want building up under your board.
At the relatively low voltages and currents common on pedalboards this isn’t the same sort of hazard as their high voltage counterparts but there’s still margin for damage or shortened lifespan where excess heat is concerned.
THE ACCEPTABLE AND GOOD
Rather than coiling, it’s much better to double back those cables on themselves in longer lengths. This way the heat distribution is significantly reduced. Plus, in my opinion, it looks infinitely more tidy. Enough said.
SHOP OUR CABLE MANAGEMENT PRODUCTS
THE NEXT LEVEL AWESOME
When it suits a customers budget, we like to cut power cables to length, making sure to leave 3-4cms of slack at the ends so as not to cause excessive tension, and then solder new connectors on the custom length ends. Customised lengths means no excess, which also means your board’s belly will be as neat and ordered as possible.
IN CLOSING
Well that just about covers it!! There’s probably one or two other areas I’ve missed or neglected, but on the whole if you follow these guidelines you’ll scarcely find yourself experiencing unwanted noise or failing power. As I said earlier, if you’re personally on a mission to upgrade your pedalboard power then please get in touch with us on email or phone the shop. We’d love to help you find the appropriate kit and get the most out of your pedals.
Thanks, and till next time, be kind and make noise… not ‘bad power’ related noise… good, wholesome noise!
Peace.
Ben


Comments
Leave a comment